Monday, July 25, 2011

Fusion Table Geodata and Google Maps

Recently I had to map some data points on a Map and Google Fusion Tables are about the easiest way there is to do this. Here's a little guide on how to make data maps yourself using some public data.

First of all I started with a list of places from a Wikipedia entry on geisha districts that I want to use on my website. So I put this into a handy spreadsheet on Google Docs.


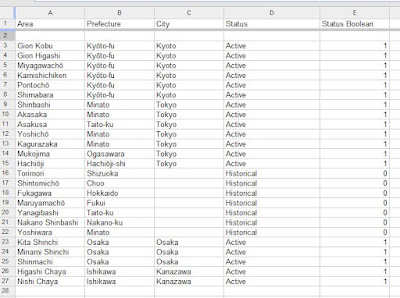
I've filled in a couple of columns about the basic location of the geisha district since some of these places are historical sites that are no longer recognised suburbs. I've also put in some information about whether the district is active or not so that I can also show this on my map.

Then I go to Fusion Tables by Google, this is where I'm going to edit and play with my data.

I select a new table and I'm given a choice of import types, if this were a CSV file that you had sourced from someone else this may be a good place to upload.


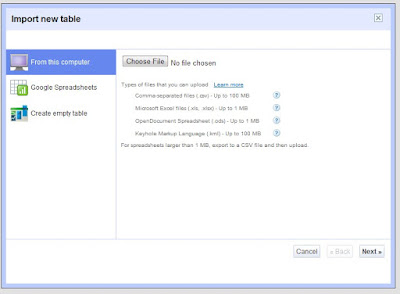
However since I'm already using Google Docs I can import from there:


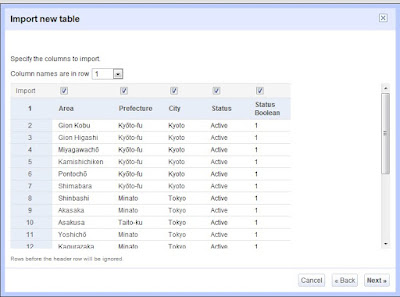
On import it will look like so


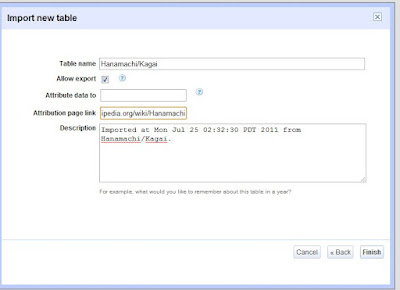
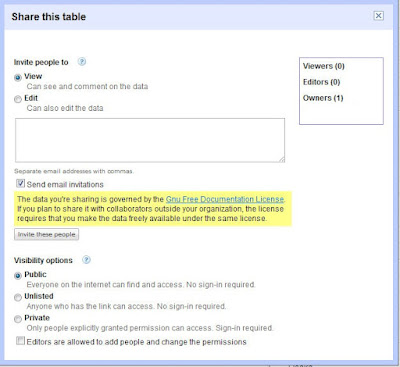
You can also choose whether people can export your data set and give the data an attribution link, in my case I'm sure to include the Wikipedia link since this puts my data under a Creative Commons agreement.


Now I want to turn this into map data, so it's important that I tell the Fusion Table what is location data so that it can process it properly. This is rather like changing cells in a spreadsheet to be date formats.


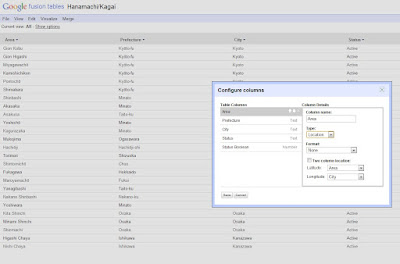
Now that my data is set to be location data I can visualise it on a map and it will automatically convert the columns I have selected as Location data into Maps Geodata.


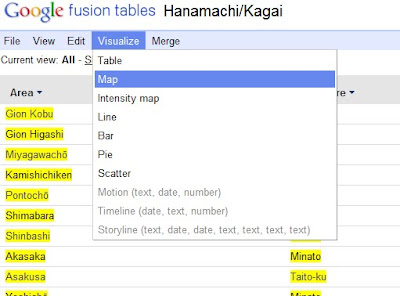
Here you can see that the location data is highlighted in Yellow.


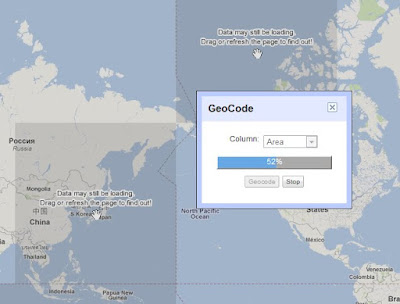
Now it will convert my data points to geo location data


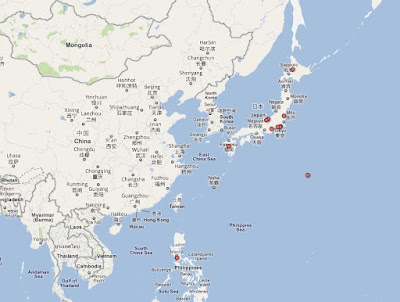
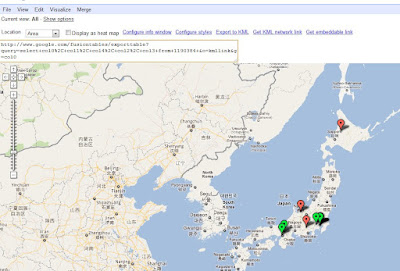
Here's the finished automatically created map, and it looks pretty good, but there's definitely some things wrong with it.


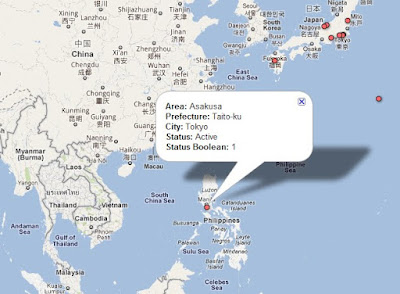
For one thing the auto location has placed Asakusa in Manila instead of Tokyo, and the status information is being shown on the info boxes instead of in the marker.


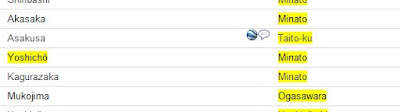
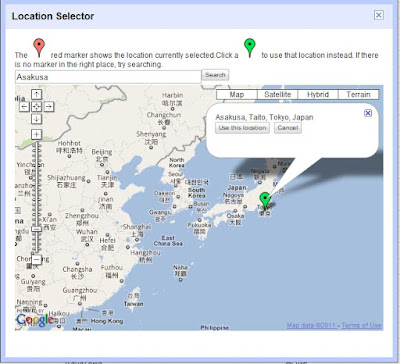
Going back to the Table View, we can see a Geodata icon next to the Location columns when I mouse over the row. Clicking on this icon will open a window and let you search for another location and use that data instead.


Then I want to change the markers on my map to show Red for historical districts and Green for those that are still active, and I prefer the Maps style markers so I'm going to use these as well.


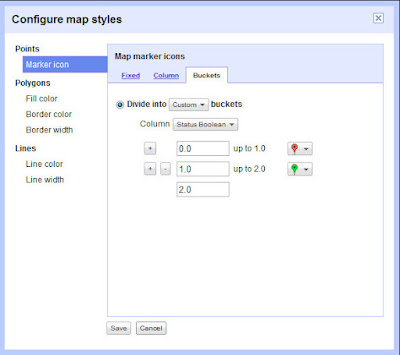
Here you can see why I chose to make my Status data set have a Boolean value, since it will only allow me to choose numeric columns for colouration.


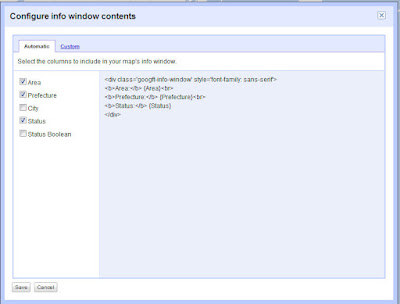
I'm also going to fix up my info box so that it shows only the columns I'm interested in being seen when you hover over the marker.


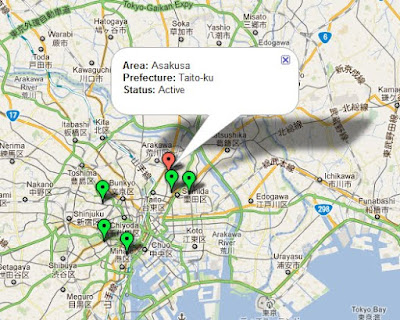
Here we can see the fixed data point on the map.

From here we probably want to do a few things with the mapped data. In my case I want to put it on a public website, so its important that I have set the data to public.


Then we have a couple of options, you can export the KML data or get the KML network link.


Either of these can be imported into a Google Maps "My Places" map


Alternatively you can pick up the embedded code straight from Fusion Tables


Which I have embedded here for you to play with!

Tuesday, February 8, 2011

Blogger, GoDaddy, DNS and Domain Names

So having moved my blog to Blogger what's the next step? Why registering a vanity domain for it of course! I started with this Google support guide for reference, this entry is just my thoughts and meanderings on the process.

If you're not confident with DNS configuration (or you just want to keep it all in the family) you may wish to register your domain with Blogger itself. This uses Google Checkout and does all the DNS configuration for you, making it super easy and Blogger friendly.

However I like many digital citizens have a number of sites and domains on the web and I wanted to keep all my products together. Mostly due to the price factor I keep a lot of my domains at GoDaddy.com, they're cheap and cheerful just be careful to only choose the options you want because they keep their prices low by high volume and hard up sell. GoDaddy uses Pay Pal or Credit Card functions rather than Google Check out so keep your details handy. Don't forget that Revision 3 have regular discounts available on their podcasts, so you can feel good about giving them referrals.

Having registered my domain now it's time to configure all the DNS information.

Firstly you need to create a CName and an A Name for your domain and since I have registered my domain with GoDaddy a configuration guide is available here along with many other common domain registrars.

If you are using GoDaddy you will need to access the Zone File Editor from the DNS Manager, it is not an obvious link so look out for it. GoDaddy sets up all domains with a number of 'obvious' CName entries such as FTP or WWW. If you are using another registrar you may need to create the subdomain CName entry. If you set up a CName of WWW then this will allow you to access your site on WWW.YOURDOMAIN.COM, a good alternative might be BLOG or ENTRIES, call it whatever you want!

Once you have created (or confirmed the existance of) your CName you need point to the blogger servers. If you are using a blank domain with no hosting on GoDaddy then the entries you are looking for will have an '@' symbol in the data line. In my case we are using WWW as the CName, this needs to be pointed at the Google server ghs.google.com so I update the configuration like so:

If you wish to have "naked" domains that is a domain that works without a subdomain address for example http://YOURDOMAIN.COM/ then you need to enter 4 AName entries:

216.239.32.21
216.239.34.21
216.239.36.21
216.239.38.21

In the GoDaddy configuration this looks like so:


Keep in mind that you need to wait out the TTL time before the DNS server will update your new configuration out to most networks, this is generally a day or two, however if you are in a rush then you may wish to update the TTL time to a lower value so that the new domain updates soon to local networks. Save your Zone File and the DNS configuration is done, now to update your Blogger with the new domain.

In your Blogger account select your blog and then go to Settings --> Publishing. Here you can select a Custom Domain instead of publishing to Blogger, as we have already purchased the Domain at another Registrar we need to choose Advanced Settings to add our vanity domain.

Once this is done you should see confirmation that your Blogspot account is associated with your Custom Domain, but keep in mind you need to wait out the TTL time that you specified in the DNS Zone File editor.

Monday, February 7, 2011

Blogger: CSS styles for code view

Did you like the code formatting in my last post? Adding a small CSS code to your Blogger template makes your code samples stand out and makes them much easier to read.

.codeview { 
font-family:"courier"; 
color: blue; 
font-size: 70%; 

margin : 15px 35px 15px 15px;
padding : 10px; 
background : #f9f9f9; 

border-top : 1px solid #eeeeee; 
border-right : 2px solid #cccccc; 
border-bottom : 2px solid #cccccc; 
border-left : 1px solid #eeeeee; 
}

There are 3 groups of style within this CSS snippet - font changes, box characteristics and border. The background makes the code stand out no matter what the format of your blogger so you can change your template at will. The colour and font face make it feel a bit more like "real" code and the border just adds a little flair. 

To install this style open the Edit HTML tab in the Design settings of your blog:


Cut and paste the code just above the close of the Skin tag in your Blogger template:

]]></b:skin>

When you wish to insert a highlighted code section you use the following template in the Edit HTML tab of your post editing:

<div class = "codeview"> 

%%YOUR CODE SAMPLE%% 

</div>
Remember when you are preparing your post content that you need to convert your code to HTML representations of the ASCII characters (for example < should be converted to &lt; ) otherwise the browser will attempt to execute rather than display the code. 


This can be easily completed with a set of simple text replacements, if you're not confident with the scripting you can use conversion scripts such as these handy examples from Palfrader.

Saturday, February 5, 2011

DFP Small Business and Blogger - Javascript in Posts

Being fairly new to Blogger there are still some tips and tricks that are new to me, and maybe to you too.

When I first placed my DFP tags into the previous post they didn't work. Curious I thought! I know that Google is very big on stopping cross site scripting injection and figured maybe this was the reason why the code wouldn't work.

A further inspection of the code however showed a much easier issue to resolve as a user of Blogger.
DFP Small business tagging instructions tell you that you need to put the script loading code into the Header of your webpage, however in the case of CMS systems and blogging platforms like Blogger you can infact paste this code into the beginning of your post.

Here is the code as it should appear:
<script type='text/javascript' src='http://partner.googleadservices.com/gampad/google_service.js'>
</script>
<script type='text/javascript'>
GS_googleAddAdSenseService("ca-pub-8884734375688780");
GS_googleEnableAllServices();
</script>
<script type='text/javascript'>
GA_googleAddSlot("ca-pub-8884734375688780", "Training_Bunyip");
GA_googleAddSlot("ca-pub-8884734375688780", "Training_Cat");
GA_googleAddSlot("ca-pub-8884734375688780", "Training_Dog");
</script>
<script type='text/javascript'>
GA_googleFetchAds();
</script>
Here is the code as it did appear in my Blog:
<script type='text/javascript' src='http://partner.googleadservices.com/gampad/google_service.js'><br /></script><br /><script type='text/javascript'><br />GS_googleAddAdSenseService("ca-pub-8884734375688780");<br />GS_googleEnableAllServices();<br /></script><br /><script type='text/javascript'><br />GA_googleAddSlot("ca-pub-8884734375688780", "Training_Bunyip");<br />GA_googleAddSlot("ca-pub-8884734375688780", "Training_Cat");<br />GA_googleAddSlot("ca-pub-8884734375688780", "Training_Dog");<br /></script><br /><script type='text/javascript'><br />GA_googleFetchAds();<br /></script><br />
The issue is all the additional line breaks, that is when I had tried to cut and paste the scripting code into the post Blogger had inserted this code into my code automatically:
<br />
This causes the browser to parse the Javascript as HTML rather than Jscript and so the ad placements fail to work because the Javascript pre-loaders are not running.
The good news is that this is really easy to fix!
Go to the dashboard of your Blog and go to the "Settings" tab and then the "Formatting" tab:

Make sure that your "Convert Line Breaks" setting is changed to No like so:
Voila! Your in post Javascript now works as intended and you can put DoubleClick for Publishers ad tags into your Blogger posts!

Monday, January 31, 2011

DFP Small Business Ad Tagging


This post is mostly for myself to do some training on DFP Small Business - the direct ad manager sales product for DoubleClick. Combined with AdSense backfill this ensures that you can sell premium inventory while never running out of ad content to serve on your website.
You can see a great introduction to DFP Small Business on YouTube, DFP Small business is a great free advertising product for Small to Medium Enterprises.
You might be interested in the following training videos that I used to set up these ads:
  1. Creating ad units
  2. Setting up content based placements
  3. Generating Tags


This ad should show kitties! 

 
  This ad should show puppies! 


  This ad I'm going to purposely have no content sold to the placement and have it back filled with AdSense data.

Thursday, January 6, 2011

A new year, a new blog

Well as part of Operation Digital Clean Up a 2011 attempt to consolidate and organise my digital life I decided to move all my blog content to Blogger (previously being a Livejournal devotee). Some of this process was not as easy as I would have liked so I am documenting this and a few other Google Product processes here and will hopefully extend the blog with other technical posts as I need them.